To connect Stripe to Voco, open Settings, then Payments in your Voco dashboard, press Connect Stripe and answer Stripe's questions on Stripe's own pages. It takes about 10 - 15 minutes and links a Stripe account of your own, so Voco can take deposits and balances for your jobs. Your bank and ID details go to Stripe, never to Voco, and Voco never holds the money: customers pay into your Stripe account and Stripe pays your bank.
This guide shows each Stripe screen in order, with what to pick. Once you are connected, the deposits guide sets up your deposit rules, and Voco payments explains the whole feature.
Step 1: press Connect Stripe in Voco
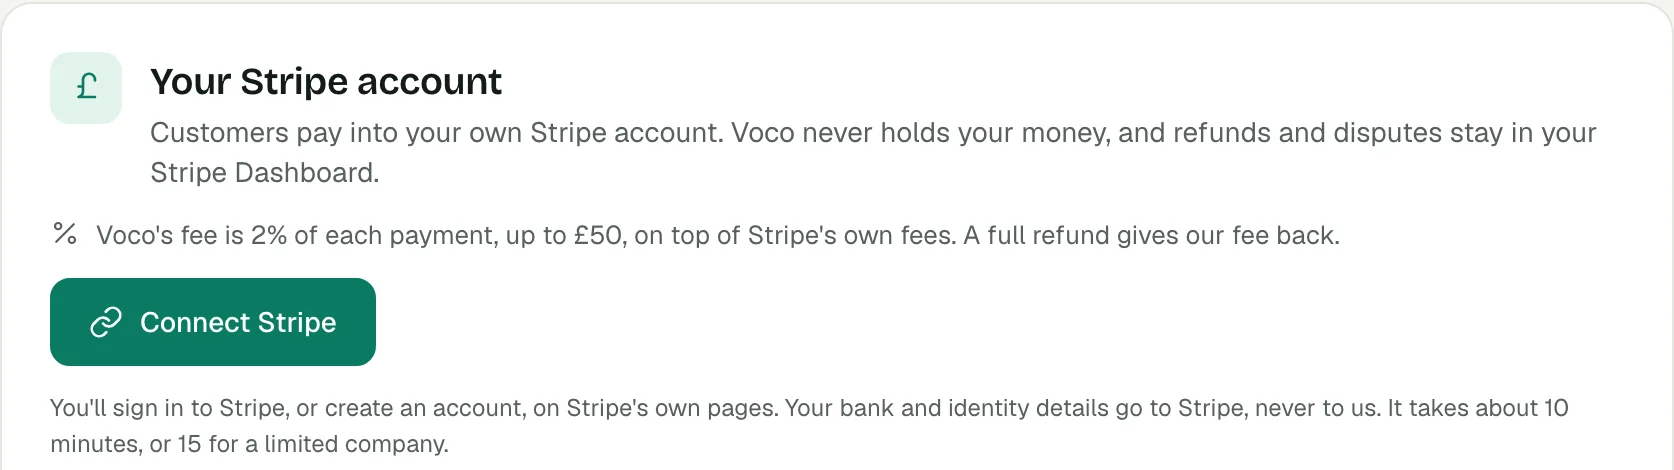
Voco starts the Stripe setup from the Your Stripe account card on the Payments settings page, which shows Voco's fee for your plan before you link anything.
- In your Voco dashboard, open Settings, then Payments.
- In the Your Stripe account card, press Connect Stripe.
Stripe's pages carry Voco's name, with a line saying Voco uses Stripe for secure financial services and a link back to Voco. The first page, Get started with Stripe, fills in your business's email. As Stripe puts it, "Have a Stripe account? You can use the same email address." If that email already has a Stripe account, Stripe asks you to sign in.
Step 2: choose your business type
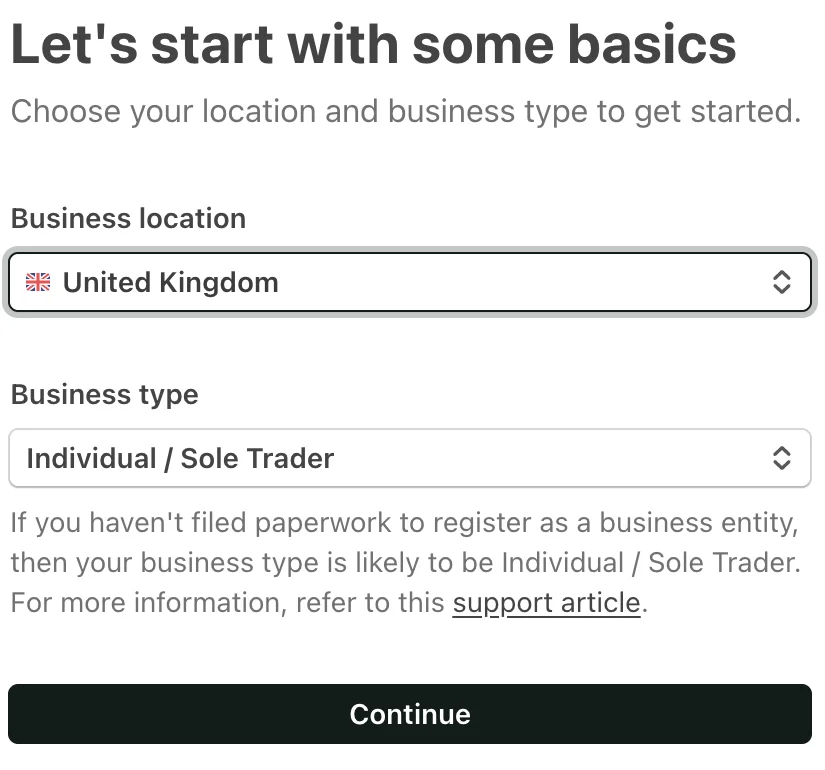
Stripe's first question, Let's start with some basics, asks for your Business location and Business type, which decide the rest of the questions Stripe asks.
Stripe's own help text says that if you have not filed paperwork to register a business entity, your business type is likely to be Individual / Sole Trader. A limited company has a few more questions, about its directors and owners.
Step 3: give your personal details
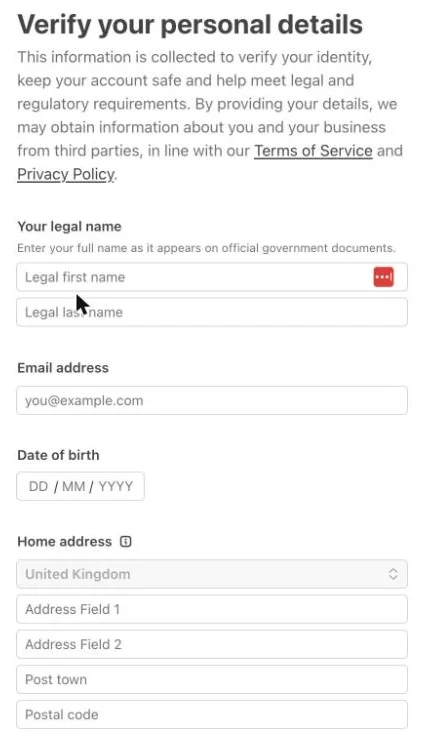
Stripe asks for your legal name, email address, date of birth, home address and phone number, because Stripe must verify your identity before it can pay you, as regulation requires.
Type your name as it appears on official documents. Stripe may ask for photo ID now or later, and emails you if it needs anything more.
Step 4: describe your business, with a real website
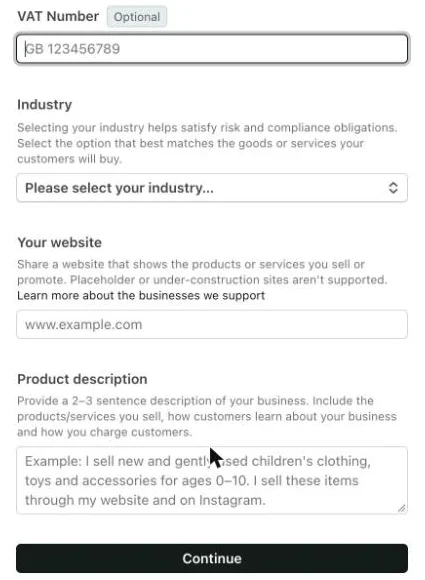
Stripe's Business details page asks for a VAT number, your industry, your website and a product description, and Stripe will not let you submit the form in the end without a website.
- VAT Number is optional. Leave it empty if you are not VAT registered.
- Industry is a drop-down. Pick the closest match: for a garage, "Auto services" sits under Professional services.
- Your website: Stripe says "Share a website that shows the products or services you sell or promote. Placeholder or under-construction sites aren't supported."
- Product description: two or three sentences on what you do, how customers find you and how you charge them.
If your business has no website, read Stripe's help on business websites before you start, because Stripe, not Voco, decides what it accepts.
Step 5: set up payouts to your bank
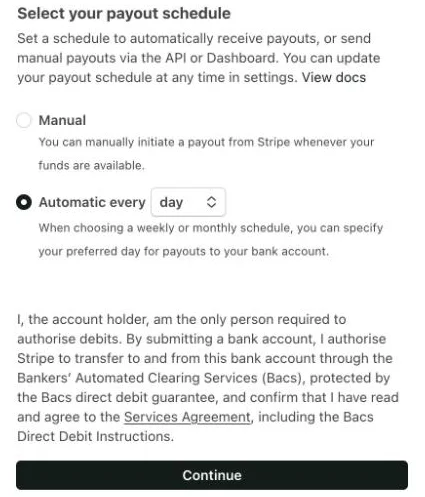
Stripe pays your money into the bank account you give here, by sort code and account number, on the payout schedule you pick, and Stripe's default schedule is Manual.
Under Select your payout schedule, choose Automatic every day, so money reaches your bank without you logging in to Stripe. With Manual, you would have to start each payout yourself. Pressing Continue also agrees to a Bacs direct debit authorisation, which is standard for a Stripe account.
Step 6: check your public details
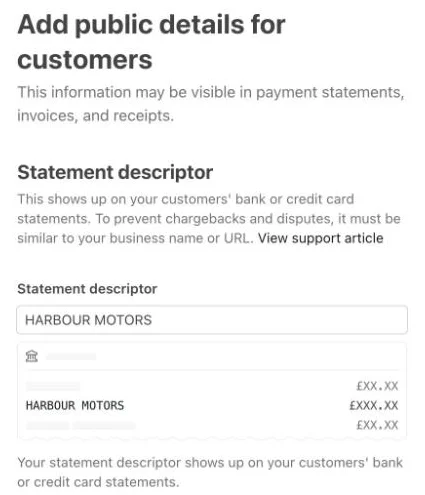
Stripe's public details are what your customers see, and the statement descriptor is the name on their bank statement, so Stripe fills it in from your business name for you to check.
Keep the Statement descriptor close to the name customers know you by, so nobody disputes a payment they do not recognise. Check the Customer support phone number is one you answer, such as your Voco number.
Step 7: pick Lite fraud protection
Stripe offers paid fraud protection plans called Standard, Plus and Pro, and Voco suggests the baseline Lite protection instead, which Stripe includes at no extra cost.
Under the dark Continue button, press the link Use baseline protection with Lite (included). On a live account, the other plans cost extra for each payment. You can change your plan later in Stripe.

Step 8: say no thanks to climate, unless you want it
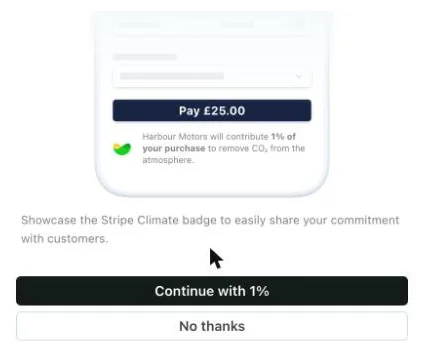
Stripe Climate is optional and gives a share of your revenue to carbon removal, and Stripe picks 1% of revenue for you, so the dark Continue with 1% button signs you up.
Press No thanks, the white button underneath, unless you want to give a share of every payment.
Step 9: choose Not right now for Stripe Tax
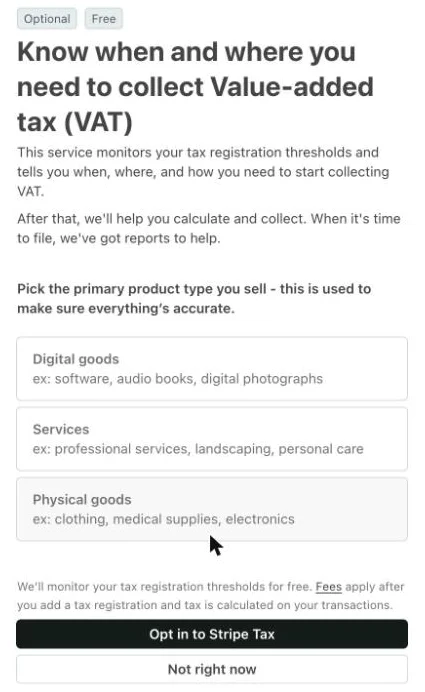
Stripe Tax is optional, and Stripe calls its tax monitoring free, but Stripe's small print says fees apply once tax is calculated on your transactions, so Voco suggests leaving it off.
You do not need to pick a product type. Press Not right now. You can switch Stripe Tax on later in Stripe.
Step 10: review and submit
Stripe's Review and submit page lists every answer with an Edit button beside each section, and Stripe will not let you submit until every section is complete.
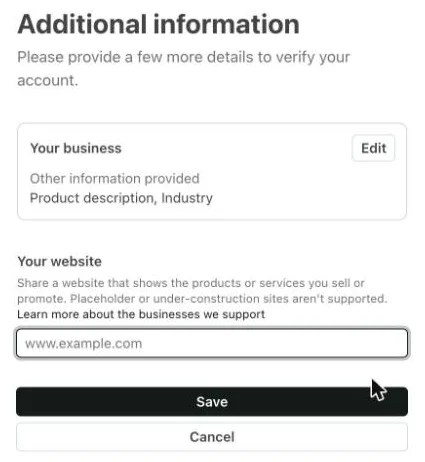
If you skipped your website, the page says "You won't be able to submit until you complete all sections." and marks Business information as Incomplete. Press Edit, add Your website and press Save.
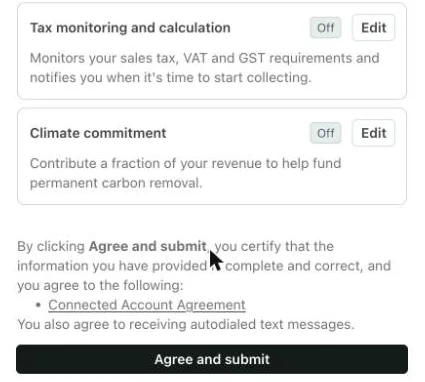
At the foot of the page, Other details shows your fraud protection plan, tax and climate. If the fraud plan does not say Lite, press Edit beside it. Tax and climate should say Off. Then press Agree and submit, which accepts Stripe's Connected Account Agreement. The review does not show your payout schedule, but you can change it later in your Stripe Dashboard settings.
Step 11: check the card back in Voco
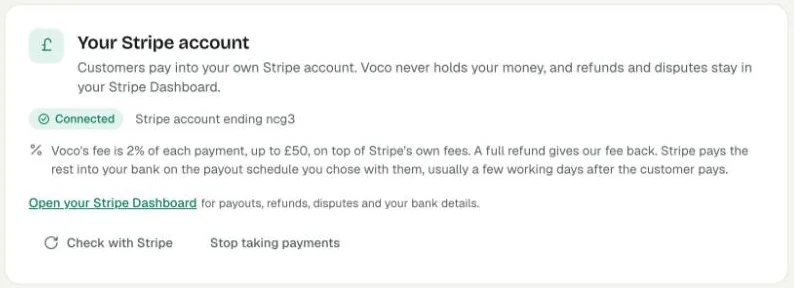
Stripe sends you back to Voco when you submit, and once Stripe has what it needs, the Voco Payments page shows a banner and the Your Stripe account card shows Connected.
The banner says "Your Stripe account is connected. Payments go straight into it." The Your Stripe account card shows Connected, then "Stripe account ending" with the last four characters of your account, Voco's fee and Open your Stripe Dashboard. Press Check with Stripe at any time to refresh what Voco knows. If the card shows Payouts not set up yet, finish your payout details in Stripe.
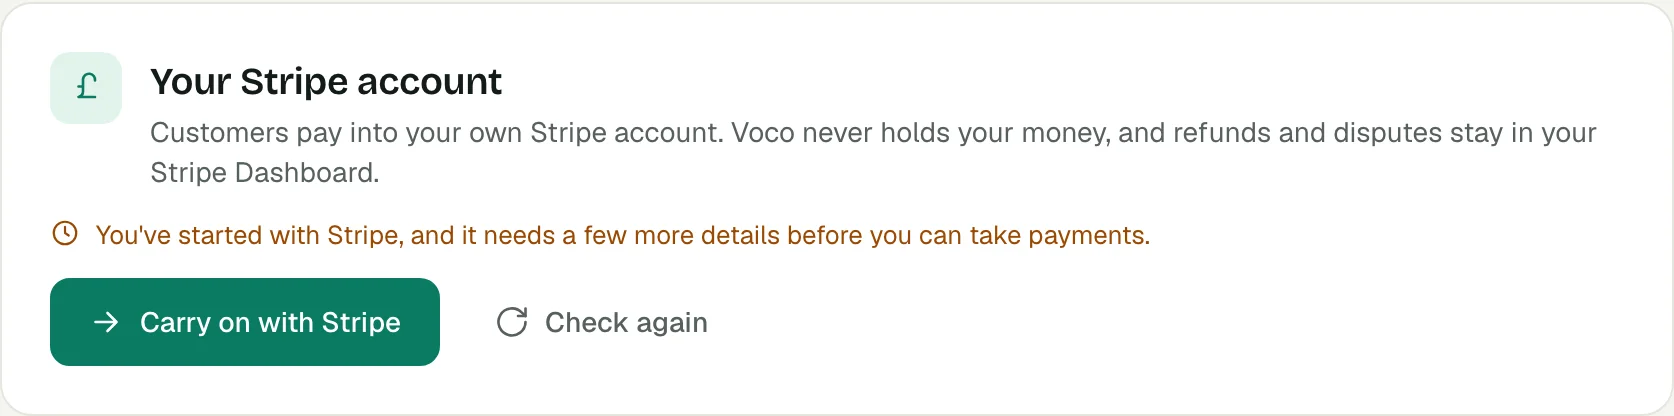
If Stripe still needs details, the card says "You've started with Stripe, and it needs a few more details before you can take payments." Press Carry on with Stripe to finish, then Check again. Stripe emails you if it needs anything later.
Next, set a deposit for each service: see How to connect Stripe to Voco and take deposits.